

Start with one folder
There's no need to add your whole collection on day one. Pick a folder with a few films you know well and make sure each one shows up in the list, has the right details and plays. Then add the rest.
On the Mac:
- Open List in the Workbench sidebar, click the source menu at the top (it usually reads All Sources) and choose Folders in List….
- For a folder on this Mac, click Add Folder…. For a folder on your NAS, click Add NAS Folder… (connect the NAS under Media Sources first). Subfolders are included.
- Answer What's in…?: Movies, TV Shows or Mixed.
- Pick Where info comes from (see the table below) and click Add to List. Nsuve starts scanning, and films appear in the list as they're recognized.
External drives work the same way. Plug in a drive Nsuve hasn't seen while the app is open and it offers to add it. Unplug it and the drive shows as Not connected; everything Nsuve knows about those films stays, and they play again as soon as the drive is back.
On iPhone and iPad, the poster wall comes from your NAS and media servers. Connect them under Sources and Nsuve recognizes the films on your NAS and lays them out as a library. See Connect your NAS, servers and drives.
How Nsuve recognizes films
Nsuve starts with the file and folder names and reads out the title, year, season and episode. If there's an NFO or artwork next to the video, it reads those too. Then it looks the title up and fills in the overview, artwork and cast.
By default it asks the Nsurator Library DB, which is built into Nsuve. Its data comes from TMDB and Bangumi, so recognition works without any key. What goes out is a query (title, year, season and episode numbers), never the video itself.
When the same film sits in more than one place, say once on your NAS and once on Emby, Nsuve matches the copies by their TMDB, IMDb and TVDB IDs and shows the film once on the poster wall.
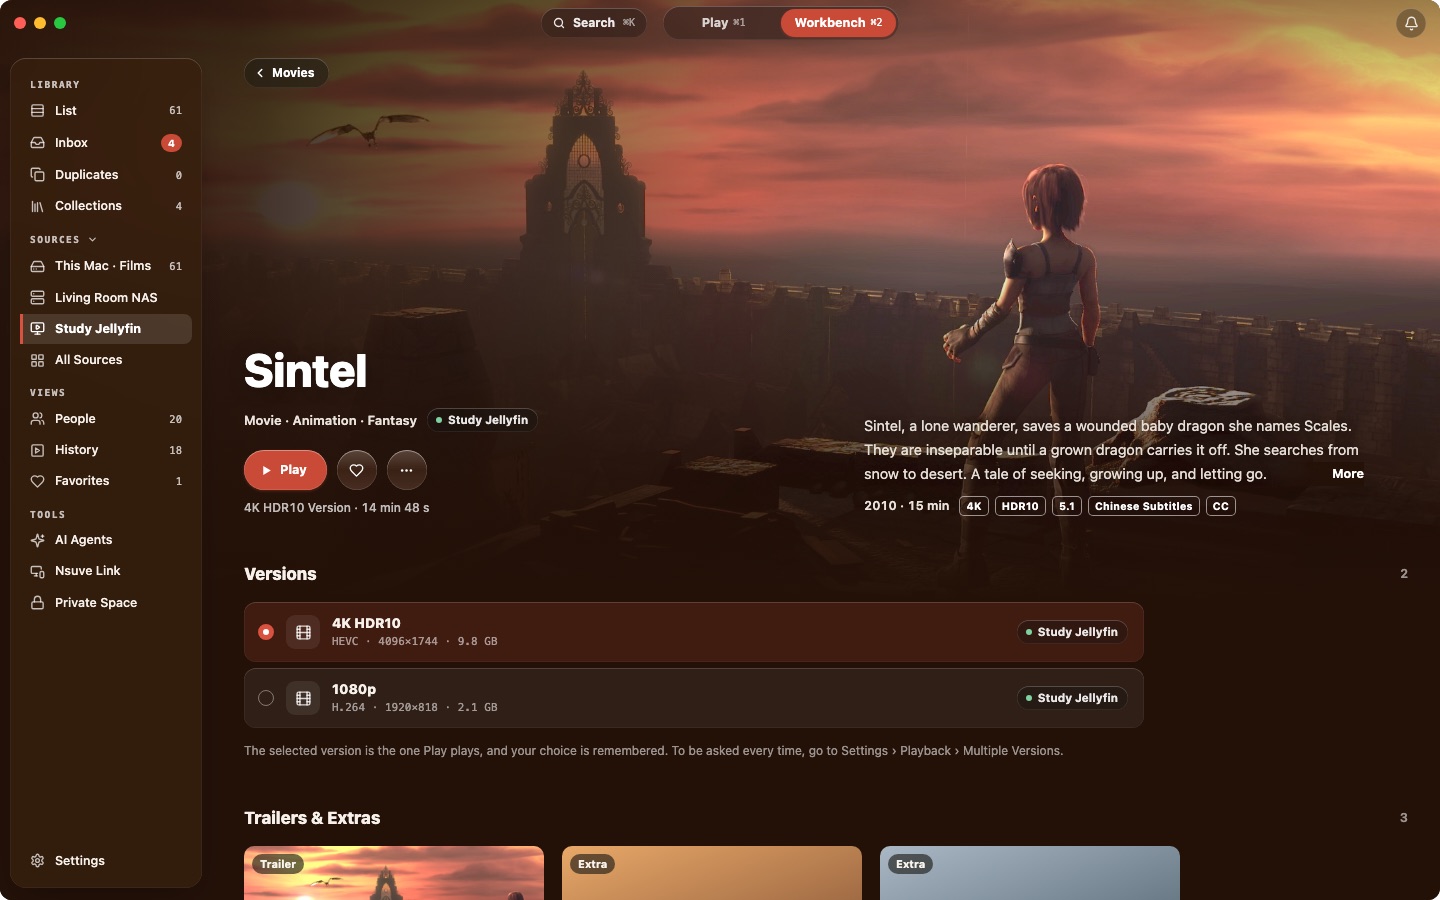
Open a film and check three things: the title and year, whether the overview fits, and whether the version listed is the file you meant. If all three look right, hit Play.
Use your local NFO files and artwork
If tools like Kodi or Jellyfin have tidied your collection before, you'll often find NFO files and images next to the videos. An NFO is a small text file with the title, year and overview. With one film per folder, this layout works:
Interstellar (2014)/Interstellar.2014.mp4: the filmInterstellar (2014)/movie.nfo: title, year and overviewInterstellar (2014)/poster.jpg: the portrait posterInterstellar (2014)/fanart.jpg: the landscape backdrop
If several films share a folder, name the extras after the video, like Interstellar.2014.nfo and Interstellar.2014-poster.jpg, so they aren't taken as info for the whole folder.
Where info comes from decides how local and online info mix:
| Option | Good for | What happens |
|---|---|---|
| Local first (default) | Some films already have NFO files and artwork | Uses the NFO and artwork when they're there, and fills the gaps online. |
| Online first | You'd rather use the library's info | Looks online first; titles, overviews and artwork come from there. |
| Local only | Your info is complete, or you'd rather stay offline | Never goes online: NFO files, artwork and file names only. |
On the Mac you set this per folder in Folders in List…. On iPhone and iPad you set it per NAS, under Recognition in Edit Source….
Want other apps to see your work? On the Mac, Settings → Library has Generate NFO Files for Videos: a movie gets movie.nfo, a show gets tvshow.nfo plus one per episode, and Kodi and Jellyfin read them as they are.
Fix a wrong match
Films with the same name, remakes or a wrong year can now and then be matched to the wrong title. Fix those before you archive or reorganize, so the wrong name doesn't end up in your folders.
- Choose Fix Match… from the ⋯ menu on the title page, the right-click menu in the list, or the details sidebar.
- Say whether it's a movie or a TV show, adjust the title and year, and search. No luck? Try without the year, or another spelling.
- Pick the right result and confirm. If none of them fit, choose Fill In Manually….
- To keep future refreshes from changing the title and poster you settled on, turn on Lock Info.
Don't like the poster? Choose Change Artwork… and pick from the posters and backdrops on offer, drag in your own image, or use Paste Copied Image.
iPhone and iPad have Fix Match too. When you tap Recognize This NAS Again in Edit Source…, the matches you fixed by hand are kept.
The built-in library or your own TMDB key
Nsuve recognizes films without anything filled in. If you'd like a second route, add your own TMDB key. It's optional, it stays in this device's keychain, and when Nsuve uses it, it talks to TMDB directly.
- On the Mac, open Settings → Movies & TV; on iPhone and iPad, open Manage → Movie & Show Info. Find My TMDB key.
- Sign in at themoviedb.org (creating an account is free), open Settings › API and request a key.
- Copy the string next to API Key and paste it into Nsuve. On the Mac, clicking Paste checks the key straight away; when it says Ready, you're done.
Once the key works, a new choice appears: Ask. It decides who is asked first when new films are recognized and when you search in Fix Match. Titles that are already recognized keep refreshing from wherever they were found.
- Nsurator Library DB First (default): if it can't find a title or can't be reached, ask TMDB with your key.
- My TMDB First: if TMDB can't find it or can't be reached, ask the Nsurator Library DB.
- Only Nsurator Library DB: your key isn't used for now; it stays saved.
- Only My TMDB: nothing is sent to the Nsurator Library DB.
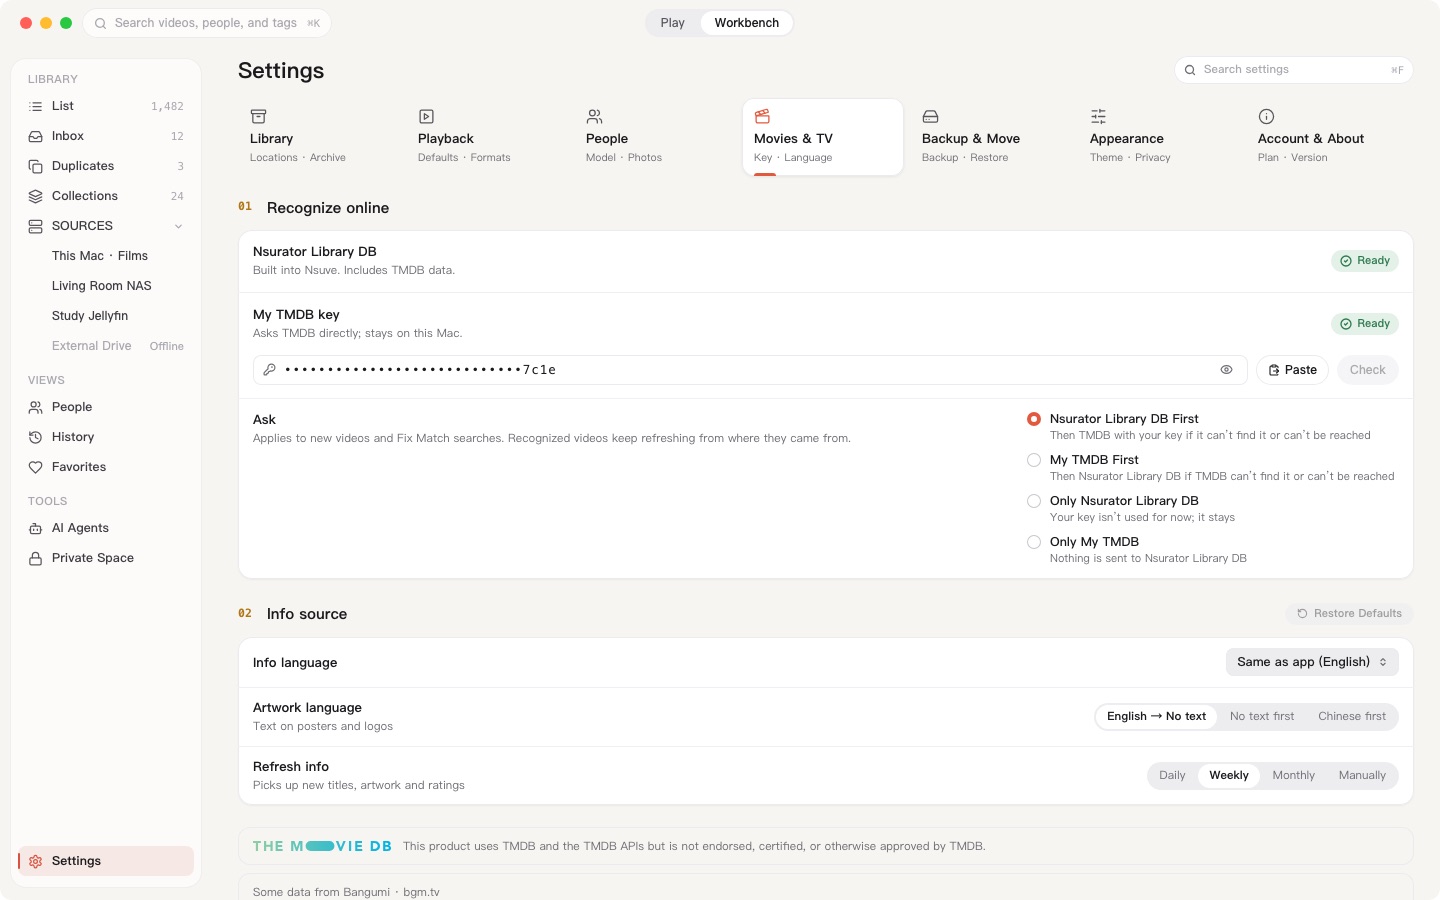
The same page sets the info language, the artwork language and how often info is refreshed. To keep a folder offline on the Mac, set its Where info comes from to Local only. On iPhone and iPad you can turn off Recognize Online on the same settings page, and the first time Nsuve wants to recognize online it asks you with a card.
Read next
- Getting startedConnect your NAS, servers and drivesConnect a NAS (SMB, WebDAV, SFTP; Synology, QNAP, fnOS), Emby, Jellyfin, Plex and cloud drives to Nsuve and get one library. What each device can connect, and what happens when a source is offline.
- OrganizingInbox first, then duplicatesOn the Mac, let the Inbox recognize new downloads and archive them into your library by your rules, with Stop and Undo at hand; then use Duplicates to find spare copies and move them to the Trash.